This hibiscus flower nails tutorial is your ticket to capturing the magic of an endless summer, a feeling I’ve often wished I could bottle up. There’s a secret I’ve learned from years behind the salon chair: the most unforgettable manicures always tell a story, and this design begins with a sun-drenched memory. For me, the inspiration came from a single vacation photo: a perfect pink hibiscus tucked behind my ear, its vibrant petals a stark, beautiful contrast against the lush green of the tropics.
That single image sparked an idea—why not wear that carefree moment right at our fingertips? This guide is more than just steps on a page; it’s an ode to botanical beauty and sophisticated, playful nail art. Whether you’re a seasoned DIY artist or a curious beginner, get ready to transform your nails into a canvas of tropical elegance.
The Pro’s Toolkit: Everything You Need
Before we dive into the artistry, let’s gather our tools. Having everything prepped and ready is the secret to a seamless and relaxing painting session. Think of it as your mise en place for the perfect manicure.
- Base Coat: To protect your natural nails and create a smooth canvas.
- Base Polish Color: A sheer neutral, creamy white, or vibrant solid—the choice is yours.
- A Crisp White Polish: For creating the intricate flower outline.
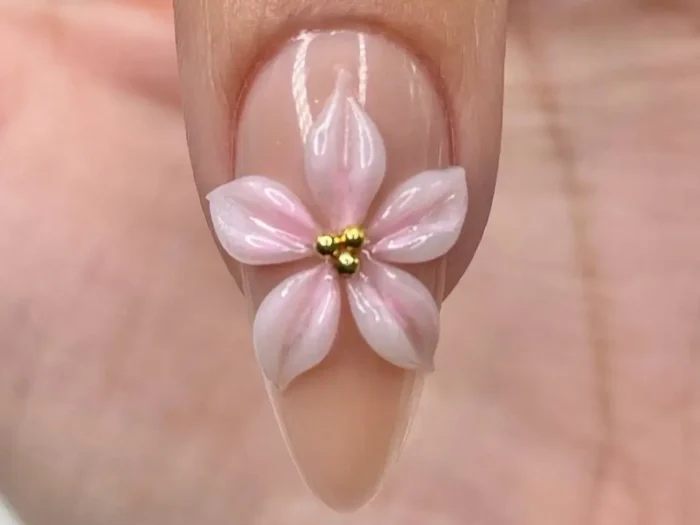
- Two Polish Colors for Petals: One for the main petal color (e.g., pink, red, or orange) and a slightly darker shade for dimension.
- A Sunny Yellow Polish: For the delicate pollen details.
- A Fine-Tipped Nail Art Brush & Dotting Tool: These are non-negotiable for creating the delicate details.
- A High-Shine Glossy Top Coat: To seal your design and deliver that professional, glossy finish.
- Nail Polish Remover & a Small Cleanup Brush: For perfecting any wobbly lines or mistakes.
Your Step-by-Step Hibiscus Flower Nails Tutorial
Let’s get painting. The technique I’m sharing with you is one I’ve honed in the salon for creating consistent, beautiful results. It builds the flower in detailed layers. Before you begin, ensure your nails are fully prepped: shaped, buffed, cleansed of oils, and with two thin coats of your chosen base color applied and completely dry. Now, for the main event.
Step 1: Map Your Petals with Guide Dots
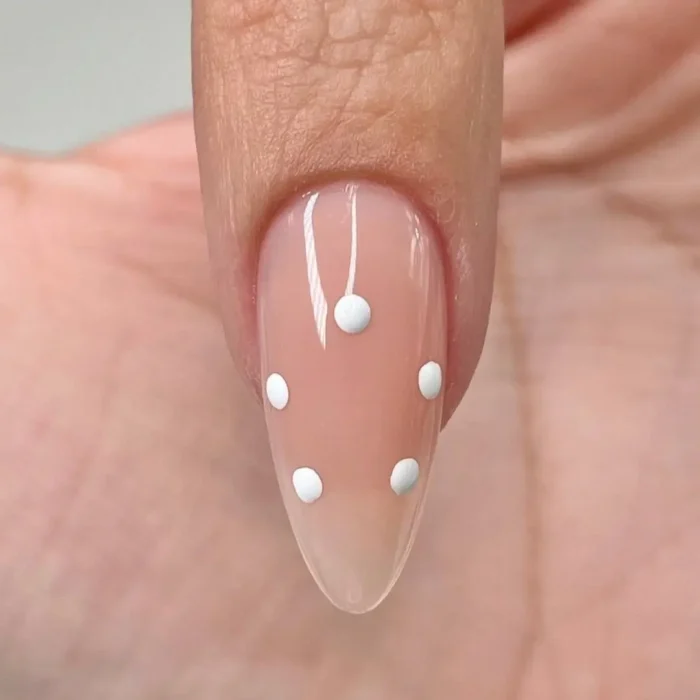
Using your white polish and a dotting tool, create a blueprint for your flower. Place five dots in a circular pattern on your nail where you want the outer edge of each petal to sit. This simple map is the secret to a well-proportioned, balanced flower.
Step 2: Build the Petal Foundations
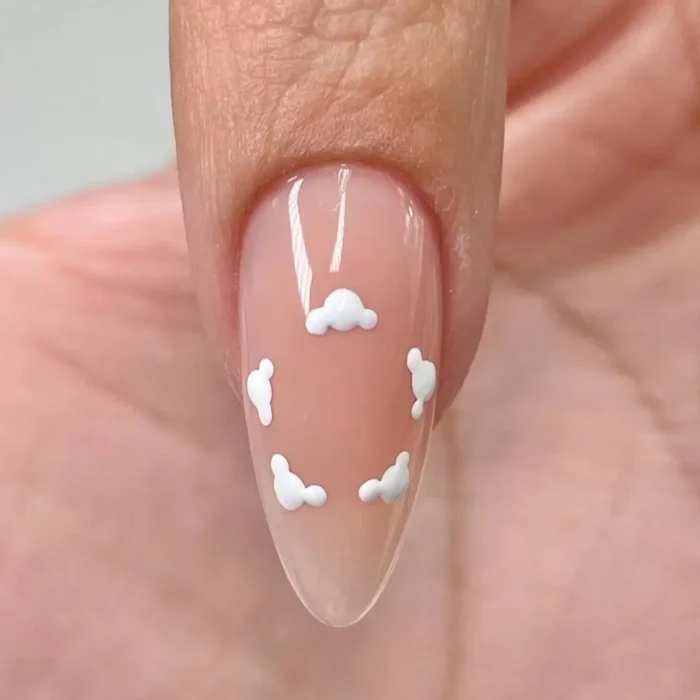
With your fine-tipped brush, begin to connect your guide dots, creating five soft, cloud-like shapes. Think of this as the initial sketch; don’t worry about perfect lines. This step builds the initial body of the petals.
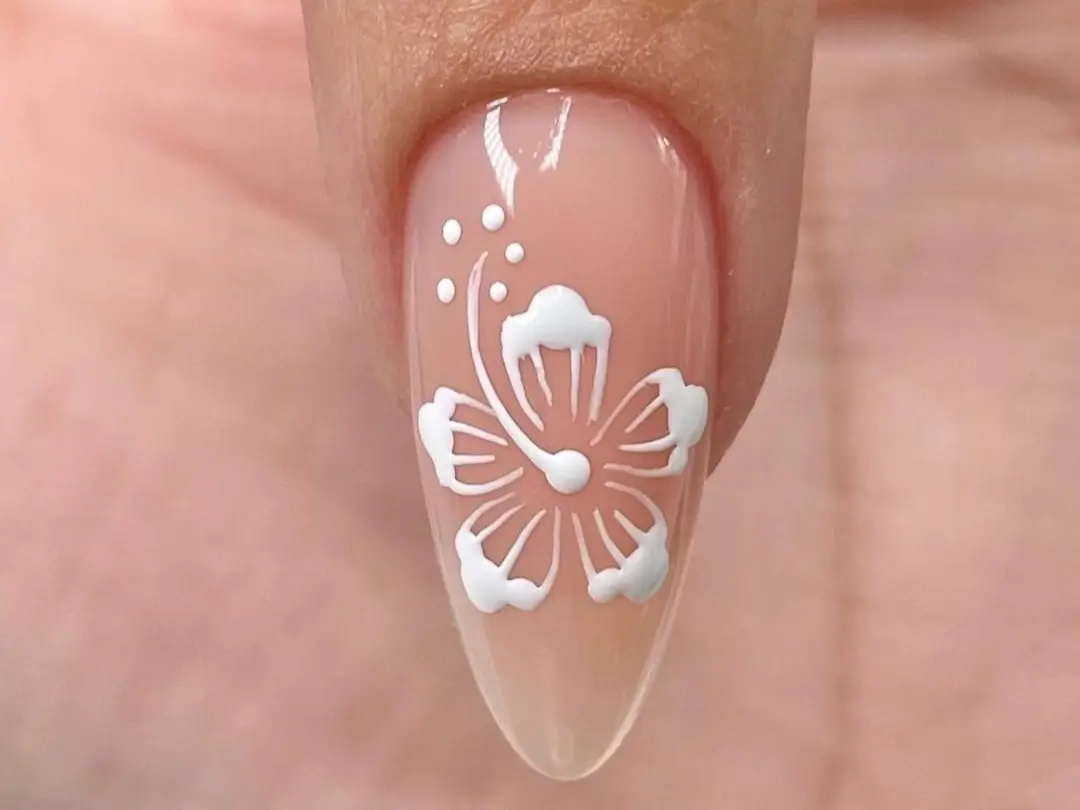
Step 3: Define the Hibiscus Outline
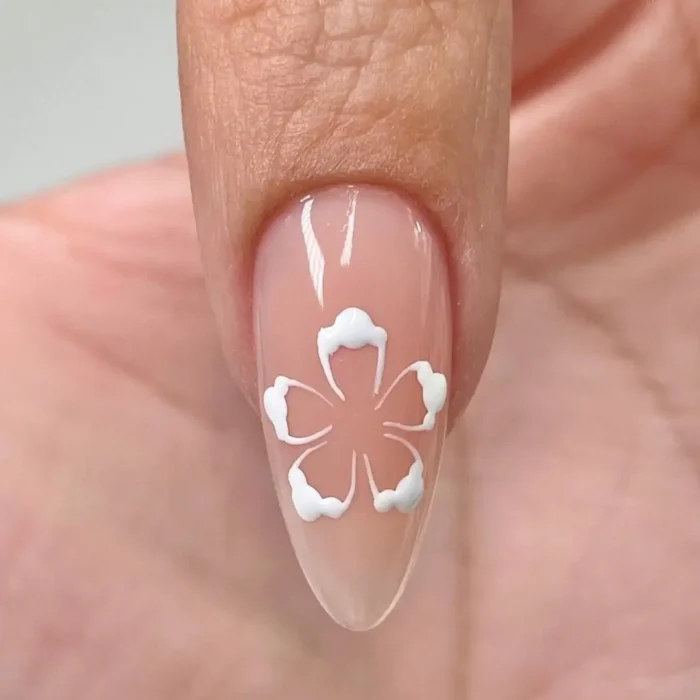
Now, it’s time to refine your work. Use your brush to neaten the edges of your petals, connecting them at the center to form a distinct five-petal flower outline. The shape should now be clearly recognizable.
Step 4: Create Petal Texture with Fine Lines
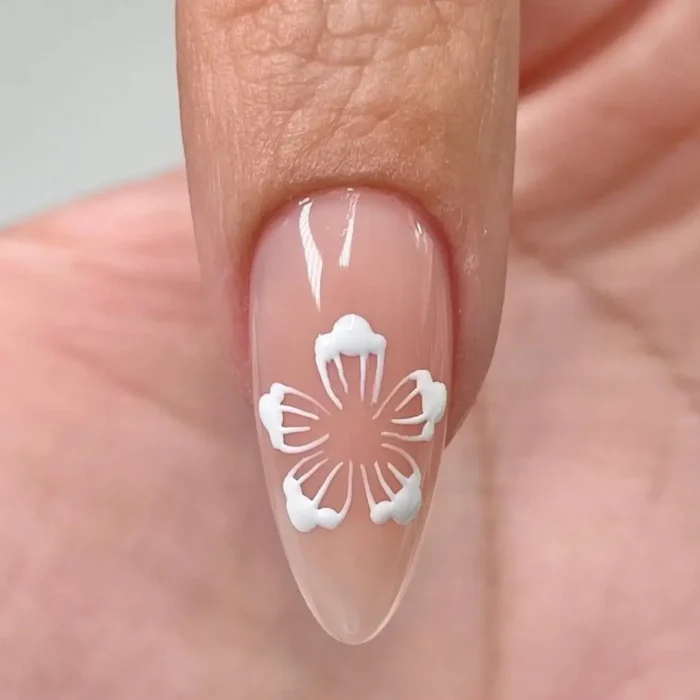
This is what adds that true artist’s touch. From the center of the flower, draw a few thin, slightly curved lines out into each petal. This technique mimics the delicate veins of a real hibiscus and adds stunning, realistic dimension.
Step 5: Establish the Center Point

Place a single, clean dot in the very heart of the flower. This establishes a focal point and serves as the anchor for the stamen, giving the design a professional, finished quality.
Step 6: Draw the Iconic Stamen
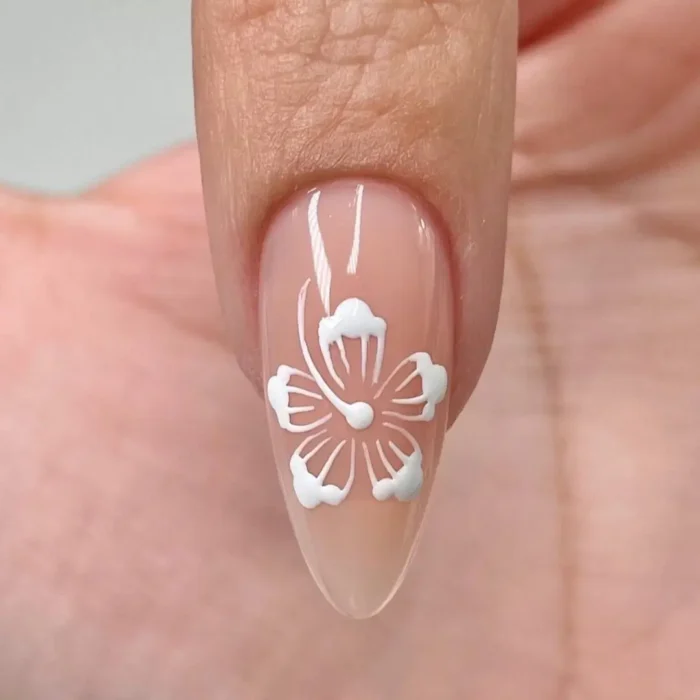
From just above the center dot, draw one elegant, curved line sweeping out to one side. This single stroke is the flower’s iconic stamen and instantly gives the design its signature character and movement.
Step 7: Add the Final Flourish with Pollen Dots
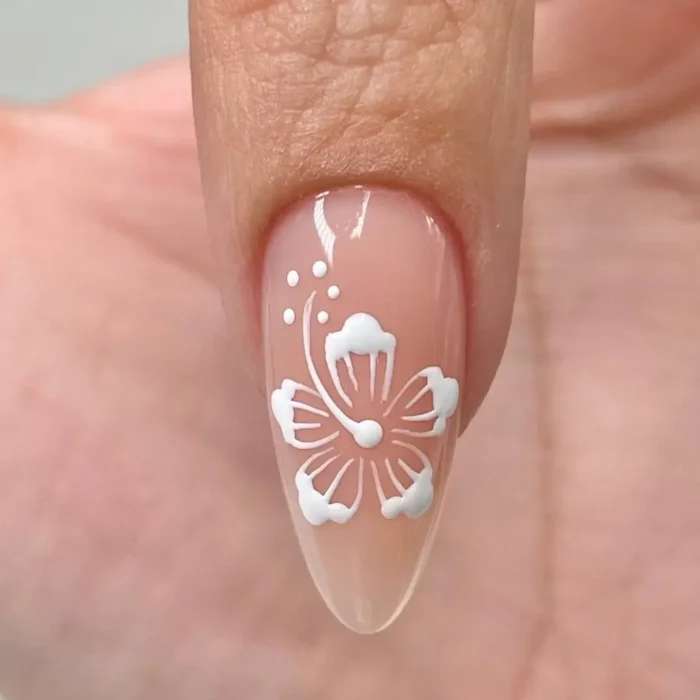
To complete the outline, add a few tiny dots of white polish to the tip of your stamen line. This represents the pollen and brings the entire flower to life with a whimsical, delicate touch. Let the white design dry completely.
Bringing It All Together: Color and Top Coat
Now for the magic. Using your main petal color (like a vibrant pink), carefully paint inside the white outlines. For a gradient effect, add a touch of your darker shade near the center of the flower, blending it slightly. Use your yellow polish for the pollen dots. Once dry, seal your masterpiece with a generous layer of a glossy top coat.
Common Hibiscus Nail Art Problems, Solved
Can I follow this hibiscus flower nails tutorial on short nails?
Absolutely. The key is to scale the flower to fit your nail length. A single, smaller hibiscus placed near the cuticle or off to one side can look incredibly chic and elegant on short nails. You can also opt for a “half flower” peeking in from the side of the nail for an artistic touch.
What are the best color combinations for hibiscus nails?
While classic pink and red are timeless, don’t be afraid to play with color.
- For a classic look: Try fuchsia, coral, or red on a white or sheer pink base.
- For a modern look: Consider white flowers on a cobalt blue, navy, or even black base for a dramatic contrast.
- For a sunset vibe: Paint your flowers in shades of orange and yellow on a bare or neutral nail.
My lines are shaky. How can I get them sharp and steady?
The secret is threefold: good tools, the right polish consistency, and a steady hand. Use a high-quality, fine-tipped nail art brush. If your polish is too thick, add a drop of polish thinner. Finally, rest your elbow on a table to steady your painting hand, and don’t be afraid to use a small cleanup brush dipped in acetone to perfect your lines.
Pro Secrets for a Salon-Quality Finish
- Work in Thin Coats: This is the golden rule of nail polishing. Thin coats dry faster, look smoother, and are less prone to smudging.
- Use a Palette: Instead of dipping your brush into the bottle each time, place a small drop of each color onto a palette (a piece of foil works great). This prevents the polish in the bottle from thickening.
- Patience is a Virtue: Allow each layer to dry completely before starting the next. Rushing is the number one cause of smudges and dents.
- Prioritize Nail Health: True beauty starts with healthy nails. Whenever possible, opt for high-quality, “5-free” or “10-free” polishes to avoid harsh chemicals. This ensures your natural nails stay strong underneath your stunning artwork.
A Final Word From Your Nail Artist
Creating beautiful nail art, especially detailed floral work like this, is a skill built on passion and practice. I’ve spent years perfecting these techniques in a professional setting, helping clients express themselves on miniature canvases. Remember that every brushstroke is a step in your artist’s journey. Don’t aim for perfection on your first try; aim for the fun of creating something beautiful with your own two hands.
Aftercare: Making Your Hibiscus Flower Nails Last
Your new nails are a work of art, so let’s make them last. Reapply your top coat every two to three days to maintain the high-gloss shine and add a protective shield against chips. When doing chores, always wear gloves to protect your manicure from harsh chemicals and hot water. Lastly, keep your cuticles and hands hydrated with a good cuticle oil and hand cream to perfectly frame your beautiful new nails.