This 3d flower nail art tutorial is so much more than a simple how-to; it’s an invitation to transform your manicure into a miniature work of art. I’ll never forget the first time I sculpted a tiny, translucent petal onto a nail—it felt like magic. The way the light caught the delicate, dimensional edges shifted the entire look from something pretty into something truly alive.
While this intricate art form can seem reserved for the steady hands of a salon professional, I believe that with the right guidance and a little patience, anyone can master it. I’m here to share the exact techniques I use in the salon, simplified for you at home to create stunning DIY 3d flower nail art.
A Quick Guide to This Tutorial
- Skill Level: Beginner-friendly with patience
- Time Required: 20-30 minutes (not including prep)
- Key Tool: High-viscosity 3D sculpting gel
- Core Technique: Shaping small gel beads into petals before curing
Why You’ll Adore This Look
Consider this the ultimate power move for your manicure. 3D nail art adds a tactile, sculptural element to your style that feels both personal and luxurious. It’s a conversation starter, a detail that catches the light in a way that is dynamic and endlessly fascinating. It’s how you elevate a simple polish into a bespoke accessory.
Tools and Materials for 3D Flower Nails
Before we begin, let’s gather your materials. Having the right tools is the first step to a flawless finish in any 3d flower nail art tutorial. Think of this as your at-home artist’s station.
- Nail Prep Essentials: A nail file, buffer, and cuticle pusher.
- Gel Base & Top Coat: A quality base coat to protect the nail and a no-wipe top coat to seal your art with a high-gloss shine.
- Nude Base Color: A sheer nude or milky white gel polish creates the perfect canvas.
- White 3D Sculpting Gel: The star of the show. Choose a high-viscosity, non-flowing gel (often called carving or sculpture gel).
- Sheer Pink Gel: For adding that delicate, lifelike wash of color.
- Fine-Tipped Nail Art Brush: A small, slightly flattened brush is essential for shaping the petals.
- Dotting Tool: For placing perfect, uniform beads of gel.
- UV/LED Curing Lamp: Absolutely necessary for setting the gel at each stage.
- Finishing Touches: Tiny metallic beads for the flower’s center and a bit of nail glue or gel to adhere them.
Your Step-by-Step 3D Flower Nail Art Tutorial
Patience is your best friend when learning how to create dimensional nail art. Work on one nail at a time, and remember you can always gently wipe off the gel and restart a step before you cure. Ready? Let’s create something beautiful.
Step 1: Prepare the Perfect Canvas
Start with immaculate nail prep. File and shape your nails—this design is particularly stunning on almond or oval shapes. Gently push back your cuticles and lightly buff the nail plate to remove any shine. Cleanse the nail, then apply a thin layer of base coat and cure it under your lamp according to the product’s instructions. Follow with two thin coats of your chosen nude base color, curing after each layer.
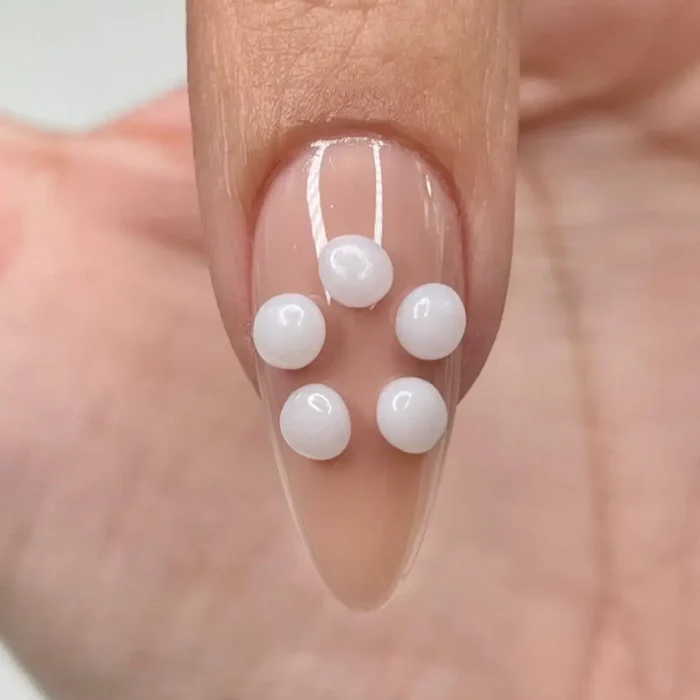
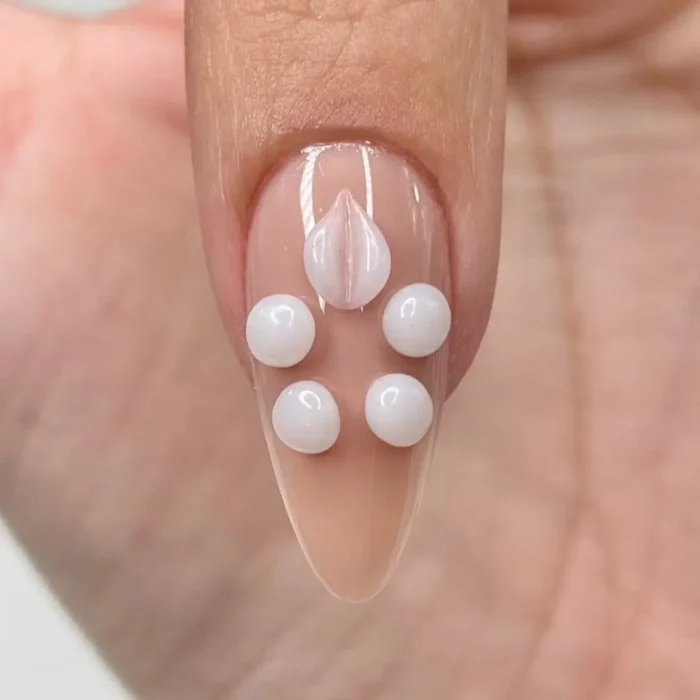
Step 2: Place the Foundations
This is where your flower begins to take root. Using your dotting tool, pick up a small amount of the white 3D sculpting gel and place five small, even beads onto the nail. Arrange them in a circle, making sure to leave a tiny empty space in the very center. These beads are the foundation of your petals.
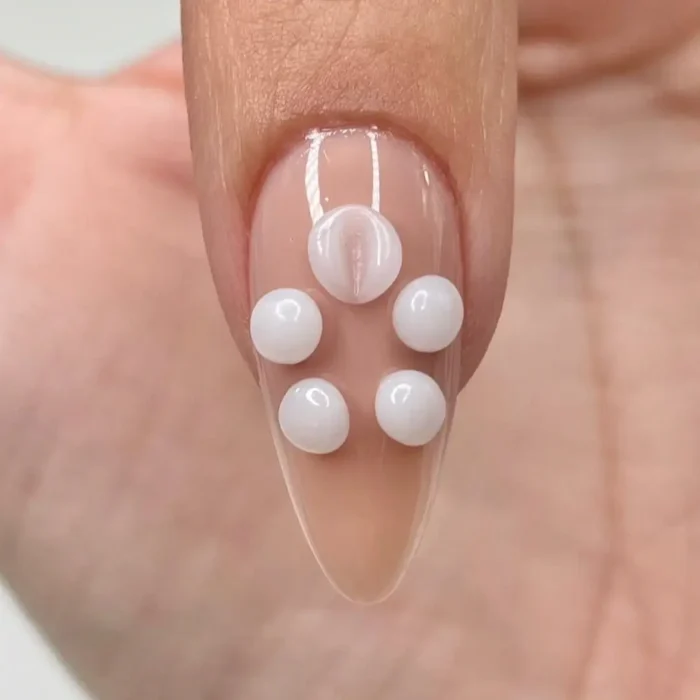
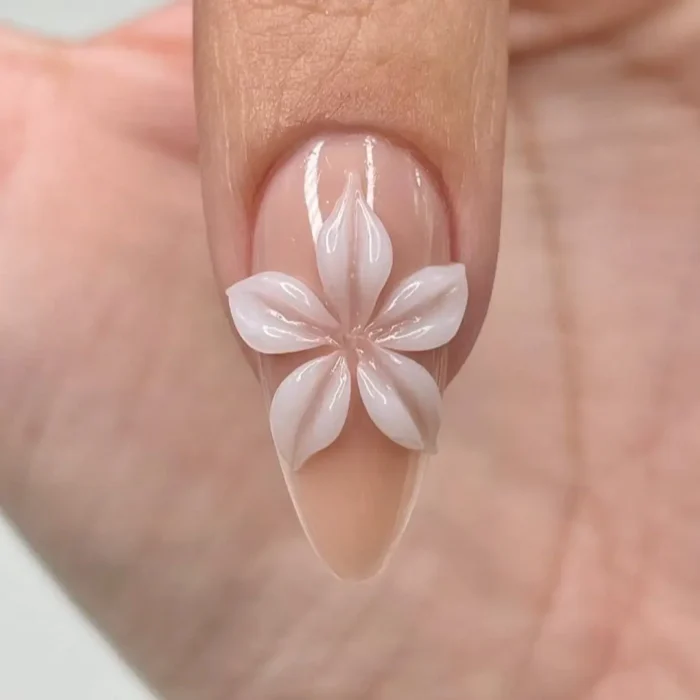
Step 3: Sculpt and Shape the Petals
Now for the magic central to creating DIY 3d flower nail art. Take your fine-tipped nail art brush and gently press down in the center of one bead, pulling the gel outwards and upwards to shape it into a delicate petal. From my experience, the key is a light, confident stroke—don’t overwork the gel. Repeat this for all five beads until you have a complete flower. The beauty is in the delicate details. Once you adore the shape, do a full cure under your lamp to set the design in stone.
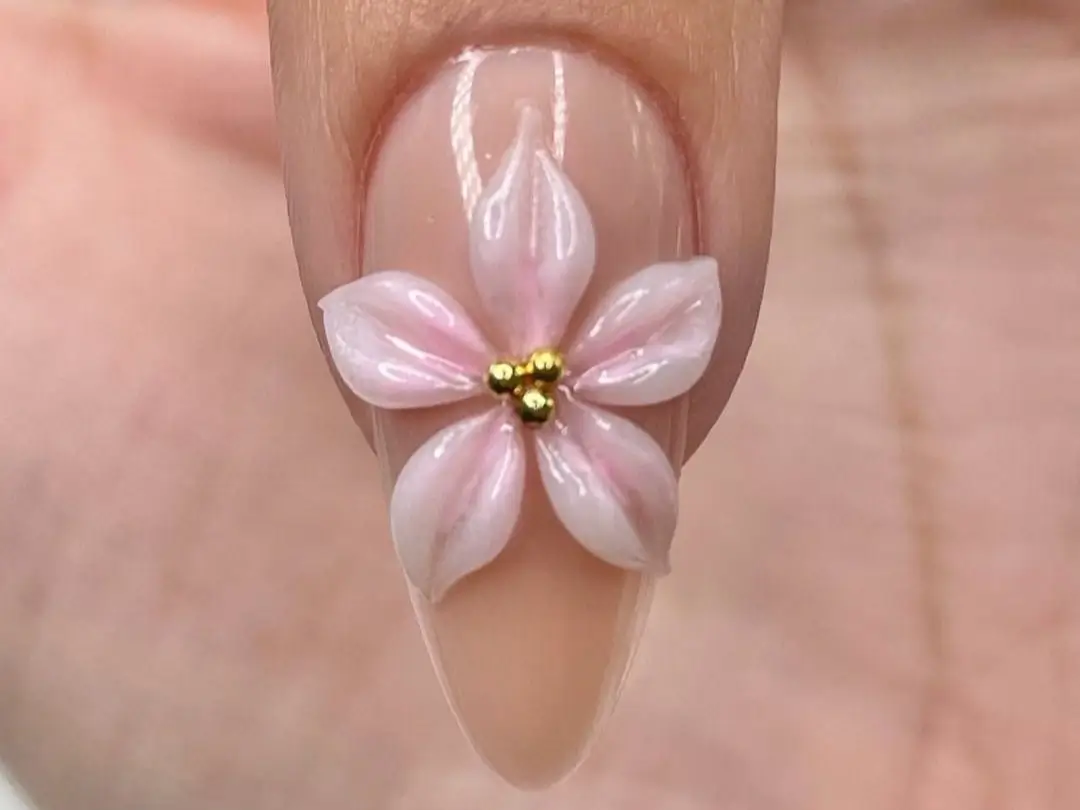
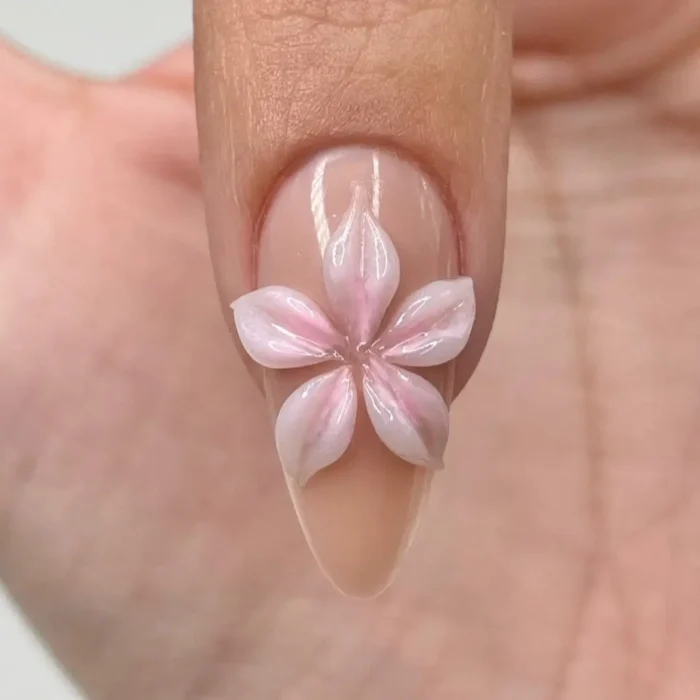
Step 4: Add a Delicate Wash of Color
If you love a more lifelike look, this step is for you. Take a very small amount of sheer pink gel on your art brush. Delicately paint it over the white petals, allowing the color to pool slightly near the center of the flower to create depth. This gives the bloom a soft, natural gradient that looks incredibly chic. When you’re happy with the tint, give it a full cure.
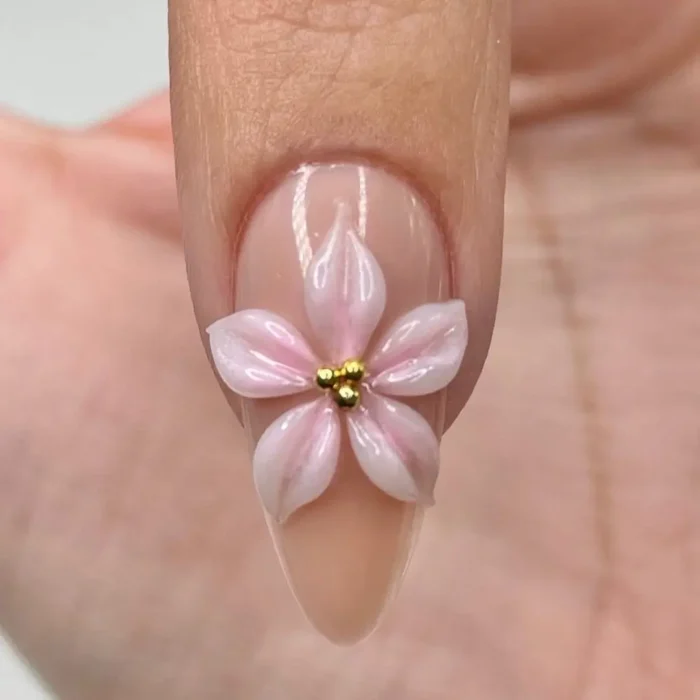
Step 5: Place the Golden Centerpiece
A touch of gold makes everything feel more luxurious. Using a tiny bit of nail glue or clear gel as an adhesive, carefully pick up and place three small gold beads in the very center of the flower. Arranging them in a tight trio adds a sophisticated, polished detail. Cure one last time to secure them firmly in place.
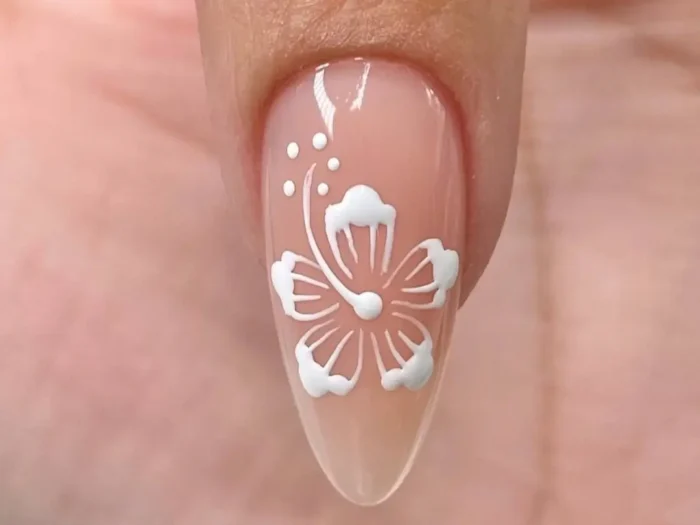
Step 6: Seal Your Masterpiece
The final, essential step. Apply a generous layer of your no-wipe top coat over the entire nail. Carefully “float” the top coat over the 3D flower, allowing it to flow into all the crevices without dulling the details of your work. I always tell my clients that this final seal is what ensures a salon-quality finish and longevity. This protects the art and gives it that unified, glossy finish. Do a final, thorough cure, and you’re done.
Common 3D Flower Nail Art Mistakes (and How to Fix Them)
Even pros make mistakes. Here are a few common hurdles when learning how to make 3d nail flowers and how to clear them.
- Petals Look Clumpy: Your bead of sculpting gel is likely too large. Start with a smaller amount; you can always add another thin layer for dimension.
- The Gel is Sticky and Hard to Shape: Your brush might be too dry. Dip the very tip of your brush in a small amount of isopropyl alcohol to help it glide, but wipe off any excess before touching the gel.
- The Flower Looks Flat: You may be pressing too hard. Use a light touch when shaping the petals to maintain their height and dimension before curing.
3D Flower Nail Art: Your Top Questions Answered
How long does 3D flower nail art last?
Think of them as having the same lifespan as your favorite gel manicure. When created with quality gel products and sealed properly with a top coat, your 3d flower nail art should last a solid 2-3 weeks without chipping or losing its design. The structure is surprisingly durable for everyday wear.
Is this 3D nail art tutorial beginner-friendly?
Yes, with a little patience! While it looks complex, the technique is based on simple placement and shaping, making it one of our favorite easy nail designs for beginners. The key is to practice on a swatch stick first to get a feel for the sculpting gel’s consistency. The most important tip? Work slowly and don’t be afraid to wipe away a petal and retry it before you cure.
How do you remove 3D nail art safely?
Proper removal is crucial for nail health. Never pick or peel off the design. The best method is to first use a hand or e-file to gently file down the bulky 3D parts of the flower until it’s nearly flush with your nail. From there, you can proceed with a standard gel polish removal process, using the soak-off method with acetone.
About the Expert

Kang Ji-Youn is a certified skincare formulator and K-beauty expert with a background at Allure & Vogue Korea and a degree from Yonsei University. She provides scientifically-grounded, trustworthy insights into the latest beauty trends.
By following this 3d flower nail art tutorial, your fingertips are transformed into a walking piece of art. It’s more than a manicure—it’s a statement, and this design is perfect for a chic summer manicure. We’d love to see your beautiful creations, so be sure to tag us in your photos!